For all of you that think baking your own bread is hard, this is the crash course on how to make it easy. It will still require some time though, mainly for the dough to rise.
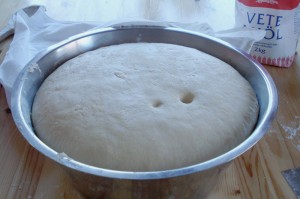
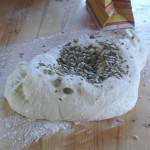
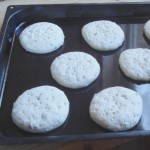
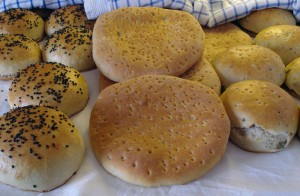
I’m gonna tell you about the base recipe for bread. The dough I use for pictures is purely a wheat dough, that was left to rise slowly for about 3 hours. I then made three variations, just by splitting the ready dough up and adding seeds to one part (buns). One part were made into flat bread cakes, that came out very nice with a great “tough” bite to it. The last portion of dough were made into buns with sesame seeds as decoration, apart from that they are natural. The dough in the picture was made with 1.5 liter of water and 50 grams of yeast.
The first rule is about liquid and yeast. The liquid of choice should not have a temperature over 37 degrees Celsius (for fresh yeast). For bread I normally use water, but sometimes I substitute part of the water with milk. You’ll need about 30 grams of (fresh) yeast per liter of liquid. More yeast gives a little faster rise, but might leave a small residue of yeast flavor. Less yeast gives a slower rise, but will get a bread with more flavor, wheat flour actually get a sort of nutty taste to it if you leave it to rise slow.
The second rule is about the flour. Here it is a lot harder to say that you need this or that amount per liter of liquid, mainly because the properties of flour varies a lot, not only between different grains, but also depending on how fresh it is. The longer the package sits in your cupboard (or on the shelf of the grocery store) the dryer it gets. A pointer would be that for wheat flour you need roughly 1.5 kilograms per liter of liquid. Now this is in no way an absolute truth, so remember to always add the flour in small portions. The first portions can be bigger then the last ones. The kneaded dough should loosen from bowl easy. At this state the dough should almost be to sticky to handle. To get a good texture out of the bread, you need to knead the though thoroughly.
Other kinds of flour can of course be used, but in general it is a good idea to have at least some wheat flour in the bread as not all grains will rise as good as wheat does. I often mix the flour with rye and barley for instance to get a bread with more fibres.
Now that is the basics, but lets face it, only using water, yeast and flour would leave us with a rather dull tasteless bread. Something more is needed to make it into a good bread.
The third rule is about salt and flavor. There are one thing you need to add not only for flavoring purposes, and that is salt. Use 2-3 teaspoons of salt per liter of liquid depending on how salty you want your bread to be. The salt can be added two ways. You either add it with the liquid, or you mix it with some of the flour. One thing about salt and fresh yeast that might be good to know, is that salt “melts” the yeast. I often spread the salt over the yeast in the bowl and let it melt the yeast while I heat the liquid. This makes it easier to stir in the yeast with the liquid.
Apart from salt flavor can in general be whatever you want to such as olive oil, syrup (treacle), honey and various spices. To add extra texture you can add different seeds and nuts. The most common way to add flavor is putting it in the dough from the start, but if you make one big dough, and don’t want it all to be the same you can knead it into the already risen dough just prior to making buns or loafs. Not all flavorings are suitable for the second method though (syrup would be hard to mix in at this state for instance).
The fourth rule is about the rising. We have partly covered this one before, when we talked about the liquid. Room temperature influences the time needed for the dough to rise. A warm temperature gives a faster rise and a colder one a slower rising. The dough should at least have doubled in size during the rise, this will take between 1 and several hours depending on temperature, both in the room and in the liquid you used. The extreme on cold rise is putting the bowl with dough in the fridge over night, and then letting it warm up to room temperature before making loafs or buns.
The fifth rule is about baking the bread in the oven. What temperature you should set the oven on depends on weather you made loafs or buns of course. A loaf takes longer to bake, so the temperature needs to be a bit lower to prevent it from being burnt. For buns and smaller loafs, like baguettes, the temperature should be 230 degrees Celsius, and it would take around 15-20 minutes to bake the buns. For big loafs the temperature should be 175 degrees Celsius, and it would take about 40 minutes to bake.
In both cases the bread should sound hollow if you lightly pound them after baking. To make a slightly crisper crust you can spray water in the oven a couple times the first few minutes. Loafs tend to get a thicker crust due to the long baking time, but that can be prevented by covering it with tin foil when the surface has formed a thin crust. When the time is up, remove the tin foil and if more color is needed give it a few minutes extra.
That’s it 🙂
You can follow any responses to this entry through the RSS 2.0 feed. Both comments and pings are currently closed.


No Responses to “Baking bread the “simple” way”
Comments are currently closed