As promised, though a day late, here comes the recipe.
Or well, not really a recipe with accurate measurements, it is more like a rough sketch. As I mentioned in the previous post there’s not really any recipes for this type of cake, it is all up to you and how you want it.
The only thing that is common in all recipes is that the fillings need to be creamy, and that it is best served the day after layering it up. To allow the bread to soak up some of the moist from the filling, simply because they taste better then.
Decorations can wait until a few hours before serving.
So what do we need for this cake?
The first thing is of course bread, any type of sliced bread will do basically. Most commonly used is white bread that you’d normally put in the toaster, pre sliced is easiest as all slices are the same thickness then.
There’s alternatives to that. As long as it is either baked to be roughly one centimeter thick, or possible to be cut into slices that thick (or thin if you prefer) and doesn’t come with a hard crust, you can use it.
The fillings
I did a three layer cake, meaning I had three types of fillings, but you can user more or less, just as you prefer.
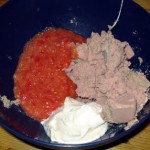
In the first layer I had liver paté, chopped tomato and sour cream. I used liver Pate that is made to be able to spread out on the bread, but you can actually use the kind that is meant to be sliced as well. With the second option a mixer is handy.
I used 600 grams of liver paté, and two tomatoes, and roughly 1 ½ deciliter of sour cream. The amount of sour cream depends a lot on the consistency of the liver paté and how big the tomatoes are. I ran the tomatoes in my blender for a short bit to make them rather finely chopped.
Stir the ingredients together well, and add some salt and pepper if needed. Put the bowl in the fridge while you mix up the other two fillings.
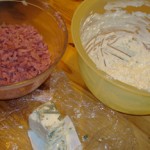
Second layer consisted of smoked turkey, blue cheese and yogurt. Yogurt may seem like an odd choice, but it works well. Another option is crème fraîche, which contains a bit more fat and is perhaps a bit softer in taste.
Don’t take a blue cheese that is to mild, it needs to have a good punch to it, otherwise there’s a risk the flavor will be a bit lost.
Use a fork, or a blender to really mix in the cheese with the yogurt. It is easiest to start with a small amount of yogurt.
Cut up the smoked turkey in rather small bits, no bigger then about 1 centimeter on each side, I did them into small strips. The reason for cutting them rather small is to make it easier both when spreading out the filling and during serving.
Mix all ingredients together, once again adding salt and pepper if needed.
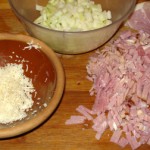
Third and last layer consisted of smoked ham, horseradish, Kohlrabi, and a blend of yogurt and mayonnaise.
The horseradish is grated, while the ham and kohlrabi is cut into small pieces, just like you did with the turkey in the previous filling.
The mayonnaise and yogurt blend consists of 2/3 yogurt and 1/3 mayonnaise. The reason for adding the mayonnaise here is mainly to get a better consistency, using only yogurt it would be too loose.
You’ll want to go easy on the horseradish, add a little at a time and take a small taster. One thing noted though is that it seemed to loose some of the punch over time, so when doing this add more until it feels like it is almost to much of it. Make sure to stir it in well with the mayonnaise/yogurt mix before adding the ham.
I assume you noticed by now that I haven’t really given any amounts, that is for a simple reason. I have absolutely no idea how much I used for each layer. I do know that I should have made less of the first layer, because I got some left from that filling. Also the amounts needed depends entirely on how big you want to make the layer cake.
Putting it together
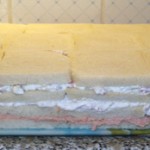
This is rather simple, place a layer of bread on a tray, or big plate. If you are using toasts, you’ll need to cut the edges clean, so you can put them tightly together until they match up the size intended.
Once you have a layer of bread, take the first filling and spread out evenly, roughly the same thickness as your bread is cut, perhaps a little thinner.
Repeat until all layers are done.
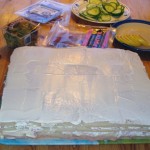
Now you have a nice base for a sandwich layer cake. Wrap it in plastic foil and put it in the fridge for at least 6 hours, preferably over night.
All you need to do before the guests arrive the next day is garnish it. Something that can be done a few hours ahead and then left in the fridge while you get ready to greet your guests.
Garnishing
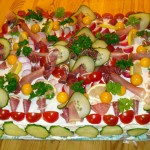
First step is spreading out a thin layer of the same mayonnaise and yogurt mix as I used for the third layer. On the top and around the edges, to allow the sliced cucumber to stick on the edges.
Again, the only limitation is your imagination.
I did stick with the meaty theme and used various types of salami, a coldsmoked ham that is similar to prosciutto in consistency and flavor, but much cheaper, as base.
To that I added cherry tomato, physalis, parsley, radish and cucumber, mainly for some color.
It is common to add small rolls of cheese as well, but I skipped that as my cheese refused to make nice slices for me 🙂
You can follow any responses to this entry through the RSS 2.0 feed. Both comments and pings are currently closed.



[…] particular comment was found in a blog post containing a recipe for a Sandwich layer cake, on my Wine and Dine blog. I seriously doubt that helped the poster in any way regarding starting a […]